Building a DIY deadlift platform is one of the best things you can do for a home gym. It protects your floor, deadens the noise, and turns even a rough garage into a proper lifting setup — and the whole thing comes in well under £150. This guide is written for UK builders, uses metric measurements throughout, and recommends materials you can actually source here.
Why You Need a Deadlift Platform

Dropping a loaded barbell onto concrete, wood, or laminate causes real damage — chipped surfaces, cracked tiles, dented concrete. In a home gym, that cost comes out of your own pocket. A deadlift platform sits between the barbell and whatever is underneath it.
There is also the noise issue. In a garage, every drop echoes. In an upstairs flat or terraced house, it travels through the joists into the rooms below. A properly built platform with rubber on the sides absorbs impact before it reaches the structure.
Beyond protection, a platform gives you a stable, level lifting surface every session. No hunting for the right spot, and it gives the gym a professional feel — which matters more than most people admit.
Materials List
All prices are approximate UK retail figures. Timber costs vary slightly by supplier — B&Q, Wickes, and local builders' merchants are all good sources for sheet materials.
| Material | Quantity | Approx. Cost |
|---|---|---|
| 18mm OSB or plywood sheet (2440 × 1220mm) | 2 sheets | £20–£30 each |
| 18mm hardwood plywood (for centre lifting surface) | 1 sheet (cut to 1220 × 1220mm) | £25–£35 |
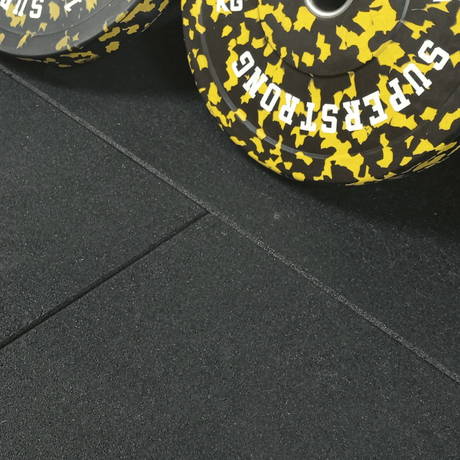
| Sprung 30mm PRO Rubber Tiles | 2 tiles | £137.78 (2 × £68.89) |
| OR Sprung 20mm PRO Rubber Tiles | 2 tiles | £65.90 (2 × £32.95) |
| Wood screws (40mm) | Box of 50 | £5–£8 |
| PVA wood glue | 1 bottle | £3–£5 |
| Polyurethane varnish (optional) | 1 tin | £8–£12 |
Total cost with 30mm tiles: ~£120–£150
Total cost with 20mm tiles: ~£85–£115
Each Sprung tile is 1m × 1m, which means a single tile covers exactly one rubber side panel of the platform. No complex cutting calculations needed.
Step-by-Step Build Guide
The finished platform will measure 2440mm × 1220mm — a full barbell width, with rubber either side for drops and hardwood in the centre for your feet. Here is how to build it.
1. Cut the base layers
Take your two sheets of 18mm OSB or structural plywood. Standard sheet size is 2440mm × 1220mm, so if you buy full sheets, there is no cutting to do. These two sheets stack together to form the base of the platform. Mark one face on each sheet so you know which sides will be glued together.
2. Glue and screw the base
Apply PVA wood glue evenly across the top face of the bottom sheet. Lay the second sheet on top, aligning edges carefully. Work from one end to the other to avoid trapping air bubbles. Clamp where possible, then fix screws every 300mm around the perimeter and in a grid pattern across the middle. This creates a solid 36mm laminated base that will not flex under load.
3. Cut the centre hardwood section
Mark out a 1220mm × 1220mm square on your hardwood plywood sheet. If you bought a full 2440 × 1220mm sheet, cut it exactly in half along the long edge. This piece forms the centre lifting surface — where your feet go during the pull. Sand the top face smooth with 80-grit paper, then finish with 120-grit. A smooth surface prevents barbell spin from scuffing it up rapidly.
4. Prepare the rubber tiles
Each Sprung PRO tile is 1m × 1m. Cut each tile to 610mm × 1220mm to fill the side panels. Use a sharp Stanley knife and a straight metal edge — a spirit level works well as a guide. Score firmly and repeat 3–4 passes. The tile cuts cleanly without a saw. 20mm tiles take 3 passes; the 30mm needs 4.
Tip: For a smaller platform in a tight garage space — say 1220mm × 1220mm — use just one tile cut in half to make two 500mm × 1000mm rubber side pieces and a matching smaller hardwood centre panel. This cuts overall cost and suits garages where space is limited.
5. Lay out the top surface
Dry-fit everything on the base before committing to fixings. Place the hardwood plywood in the centre of the base. Place one rubber tile section on each side. The total layout from edge to edge: 610mm (rubber) + 1220mm (hardwood) + 610mm (rubber) = 2440mm. That fills the platform exactly. The rubber sections absorb the shock of barbell and plate drops; the hardwood gives firm, stable footing while lifting.
6. Secure everything
Fix the hardwood section to the base with 40mm screws at 300mm intervals. Keep screws away from the area directly below where the barbell will contact the floor — you do not want steel hitting a screw head mid-session. For the rubber sections, use 40mm screws with large-diameter washers underneath the screw heads. Rubber compresses and a standard screw head will pull through over time without a washer spreading the load. Fix at 300mm intervals around the perimeter of each rubber panel.
7. Finish (optional but recommended)
Apply two coats of polyurethane varnish to the top face of the hardwood centre section. Use a brush or foam roller and allow 24 hours drying time between coats. This seals the wood against sweat and prevents splinters from forming at the barbell contact point. Leave the rubber sections unvarnished — they are already weather-resistant.
Allow the completed platform to off-gas in a ventilated space for a few hours before first use. Then lift.
Which Rubber Tiles to Use

Most DIY platform guides written for UK builders default to horse stall mats — the thick agricultural rubber you can find at farming suppliers. They work, but they are not purpose-built for gym use. Density varies between batches, the smell can linger for months, and they have no certification for gym applications.
Sprung's PRO tiles are manufactured specifically for weightlifting environments. Here is which one to choose:
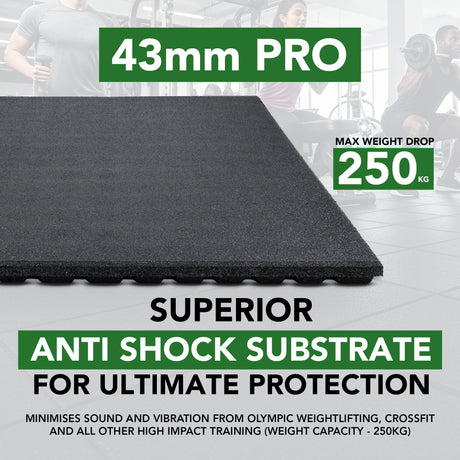
30mm Sprung PRO — £68.89 per tile
This is the recommended option for a deadlift platform. The 30mm thickness handles a maximum drop weight of 200kg, which covers virtually any home gym load. The extra depth absorbs more energy before it reaches the base and subfloor, which translates directly to less noise and less barbell bounce on drops. If there are any people or rooms below your gym space, go with the 30mm.
20mm Sprung PRO — £32.95 per tile
The budget choice. Rated to 140kg max drop weight, which is adequate for most home gym deadlifters working under 150kg. If your current deadlift max is in the 100–130kg range and you are lifting on a ground-floor concrete slab, the 20mm tiles do the job at roughly half the cost of the 30mm.
Why Sprung PRO beats stall mats:
- Consistent density: 950–1,000 kg/m³ across every tile, every batch. Stall mats vary.
- Low odour: SBR rubber with a polyurethane binder. No agricultural smell.
- Certified: REACH and CE certified — relevant if you ever use the space commercially.
- Bevelled edges: Clean finish around the perimeter of the platform.
- 4-year warranty: Stall mats come with none.
- Rated 4.9/5 from over 543 verified reviews.
Cost Breakdown
Here is the full build cost compared to the alternative of buying a pre-made platform.
| Build Option | Material Cost | Notes |
|---|---|---|
| Budget build (20mm tiles) | ~£85–£115 | Adequate for lifts under 140kg |
| Recommended build (30mm tiles) | ~£120–£150 | 200kg rated, better noise reduction |
| Pre-made deadlift platform | £300–£600+ | Typically ships flat-pack, still needs assembly |
The DIY route saves £150–£450 depending on what you would have bought. The platform you build yourself will also be exactly the size your space requires — not a standard size that may or may not fit a specific garage layout.
On delivery: Sprung offers free delivery on orders over £250. Two 30mm tiles come to £137.78, which falls just below that threshold. If you are also flooring the rest of the garage — which most people do eventually — order the platform tiles alongside your main flooring to clear the £250 minimum. Use the Sprung flooring calculator to work out how many tiles the wider space needs.
Platform Maintenance
A well-built platform needs very little upkeep.
Rubber tiles: Wipe down with warm soapy water after heavy sessions. Avoid bleach, solvent-based cleaners, or anything oil-based — these break down the SBR rubber compound over time. Sprung PRO tiles are UV-stable, so they will not discolour or become brittle if the garage gets direct sunlight. They will not curl at the edges the way cheaper rubber can. Expected lifespan with normal home gym use: 10 years or more.
Hardwood centre section: Re-apply a coat of polyurethane varnish annually, or sooner if the surface starts to look dull or feels rough. Wipe the surface clean and lightly sand with 120-grit before re-coating. This takes 20 minutes and extends the life of the wood significantly.
Fixings: Check screws quarterly — a quick visual inspection and a push on each rubber panel to confirm nothing has worked loose. Rubber under repeated impact load can cause screws to back out gradually over time. Tighten any that have moved and add a fresh screw alongside if the original hole has enlarged.
Done consistently, this adds up to about 30 minutes of maintenance per year. The platform will outlast most of the equipment sitting on it.
Ready to Build?
The materials are straightforward, the tools are basic, and the result is a platform that matches or exceeds what commercial suppliers sell for three to four times the price. The key upgrade over most DIY builds is the rubber — purpose-built gym tiles rather than agricultural mats make a measurable difference in noise, performance, and longevity.
Start with the 30mm Sprung PRO tiles if the budget stretches, or the 20mm PRO tiles if keeping costs as low as possible. Either way, the rest of the garage floor can follow — browse the full garage gym flooring collection to finish the job properly.

![20mm Java Black Rubber Gym Flooring Tiles with Recycled Coffee Grounds [Pre-Order] GYM FLOORING Sprung Gym Flooring](http://www.gym-flooring.com/cdn/shop/files/Title_2.png?v=1773994895&width=460)