Renting? How to Build a Home Gym You Can Take With You is really about choosing flooring, equipment and a layout that work properly now without becoming part of the property when you eventually move.
A rented house or flat does not rule out having a useful home gym. The key is to avoid permanent alterations and build the space from components that can be lifted, dismantled and taken with you.
That means no glued-down flooring, no equipment fixed into walls and no installation that leaves you facing repairs when the tenancy ends.
For many renters, a simple area of heavy rubber flooring with freestanding equipment is enough to turn a spare room, garage or unused corner into a proper training space.
The First Rule: Keep Everything Reversible

Before changing a rented room, check the terms of your tenancy agreement and speak to your landlord or letting agent if you are uncertain about what is permitted.
The safest approach is simple: nothing glued, nothing drilled and nothing permanently attached to the property.
Gym flooring should sit on top of the existing floor rather than being bonded to it. Racks and benches should be freestanding. Storage should stand on the floor rather than being fixed to the wall.
The aim is to create a gym that behaves like furniture.
It comes into the property with you and leaves with you.
That is particularly useful if you expect to move again, because the money you spend on the gym is not lost when the tenancy finishes.
Why Loose-Lay Rubber Tiles Work Well for Renters
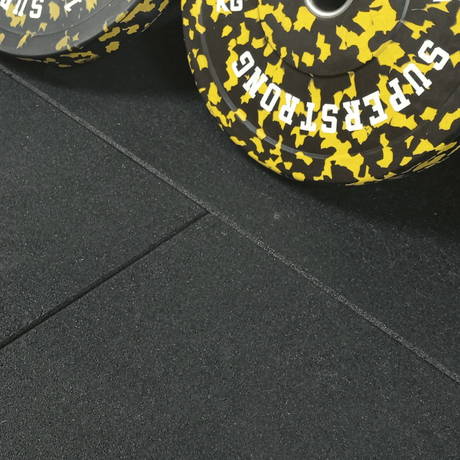
One of the easiest ways to create a temporary gym floor is with loose-laid rubber tiles.
Unlike sheet flooring that may need adhesive, individual heavy rubber tiles can simply be positioned over a suitable flat, clean surface.
The weight of substantial rubber tiles helps them remain stable during normal training without needing to be permanently fixed to the subfloor.
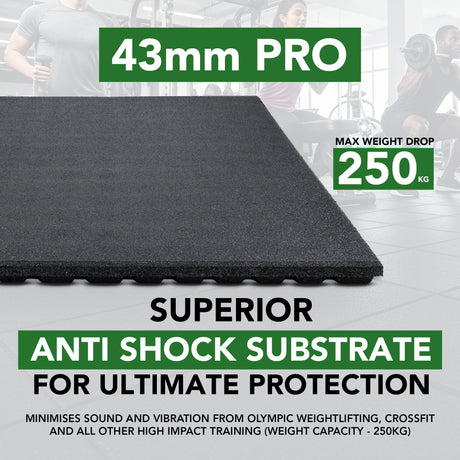
Sprung's PRO flooring is designed to be loose-laid without adhesive, making it particularly useful where you need a removable floor rather than a permanent installation.
For a typical home weights area, the 20mm PRO tile is a practical starting point.
Each tile covers 1m × 1m, so planning a small rectangular training zone is straightforward.
Because the tiles remain separate, you also have flexibility later. If you move into a bigger property, the existing tiles can become the starting point for a larger floor rather than being discarded.
Interlocking Tiles Are Another Removable Option

Another portable option to consider is interlocking gym tiles.
There are several forms of interlocking rubber floor, but hidden-connector systems are particularly useful when you want the appearance of conventional straight-edged tiles without permanently fixing the floor.
Small connection inserts sit underneath adjoining tiles and help keep them locked together. Because the connectors are hidden below the surface, you do not have visible puzzle-shaped joins across the gym.
Most importantly for a rented property, the system can still be installed without adhesive.
When it is time to move, you can disconnect the tiles, lift them individually and take the complete floor with you.
Interlocking systems can be particularly useful for training that involves more movement across the floor or where you simply want the reassurance of each tile being physically connected to the next.
Protecting the Existing Floor Underneath
A removable gym floor still needs to protect whatever the landlord owns beneath it.
The first step is to understand the existing surface.
Hard flooring such as concrete, properly installed laminate or similar firm surfaces can provide a straightforward base, provided they are flat, stable and suitable for covering.
Carpet needs a little more thought.
A firm, short-pile carpet can sometimes provide a suitable base for a temporary training area, while a deep or very soft carpet may allow tiles or equipment to move excessively.
The condition of the floor also matters.
Clean the room thoroughly before laying the gym flooring. Small pieces of grit trapped underneath can cause unnecessary rubbing against the existing finish.
You should also deal with any existing moisture problem before covering a floor. Rubber flooring should not be used to hide damp or an underlying building issue.
If you are unsure how the room, flooring type or training style affects your choice, our buyer's guide gives a useful overview of flooring type and thickness.
Be Careful With Timber, Vinyl and Delicate Finishes
If the rented property has an attractive floor that you need to return in exactly the same condition, take extra care before covering it.
Some floor finishes can react differently when another material is left in contact with them for long periods.
Rather than assuming any covering is suitable for every decorative floor, check the flooring manufacturer's guidance where possible and test the setup in an inconspicuous area.
It is also worth lifting a tile periodically when you clean the room so you can check that the original surface remains clean and dry.
The important point is that your protective gym floor should genuinely be protecting the rented floor, not simply hiding it until moving day.
Choose Gym Equipment That Doesn't Need Wall Fixings
The same principle applies to the equipment.
A renter-friendly home gym should be built around freestanding kit wherever possible.
Depending on how you train, that could include dumbbells, kettlebells, a bench, freestanding storage, cardio equipment and a suitable self-supporting rack.
Avoid building the design around equipment that needs to be screwed into a wall, bolted through the floor or otherwise permanently attached to the building.
Even relatively small changes can create work at the end of the tenancy. Wall-mounted storage, brackets and anchor points all leave holes that may need to be filled and redecorated.
Freestanding equipment makes moving much simpler.
It also gives you greater freedom to change the layout. If the treadmill works better beside the window or you need more room around the bench, you can reorganise the space rather than being dictated to by permanent fixing points.
Think in Zones Rather Than Flooring the Whole Room

Renters do not necessarily need to cover every square metre.
If you are creating a gym in a spare bedroom, you may only need to protect the section where the equipment and weights sit.
A defined gym zone keeps the project simpler and gives you less flooring to move later.
It also works well where a room needs to serve two purposes.
A 2m × 3m gym area, for example, gives you 6m² of usable training space.
With 1m × 1m tiles, that means six full tiles for a straightforward rectangular layout before considering the specific shape of the room or any cuts required.
That is enough to create a clearly defined training surface without permanently converting the whole room.
What Should You Buy for a 2m × 3m Home Gym Zone?
For a straightforward rented home gym with strength training and general exercise, a practical setup would be:
6 × 1m² 20mm rubber tiles
Arrange them as two tiles across by three tiles long.
The 20mm PRO tile is designed for loose-lay installation, so the tiles can sit over the prepared existing floor without adhesive.
Alternatively, choose a compatible interlocking rubber system if you want the tiles physically connected.
Then build the equipment around how you actually train rather than trying to reproduce a commercial gym.
A compact setup might include a freestanding bench, dumbbells or adjustable dumbbells, kettlebells and a freestanding rack where appropriate.
Keep sufficient clear floor area for the exercises you perform and make sure equipment is stable before training.
For renters, simplicity is usually an advantage.
Six useful pieces of equipment that can be moved easily are generally more practical than a room full of kit that becomes difficult to transport.
Moving Day: Lift, Stack and Take It With You
This is where modular gym flooring really earns its keep.
There is no glued surface to strip out and no roll flooring to sacrifice.
Remove your equipment first and clean the surface of the tiles.
Loose-laid tiles can then be lifted individually. With a connector system, disconnect the tiles carefully rather than dragging the assembled floor across the room.
Clean both the tiles and the original floor underneath before leaving the property.
Once transported to your next home, the same flooring can be laid again.
The new room does not even need to be the same shape.
Individual tiles allow you to reconfigure the floor to suit the new space. A 2m × 3m rectangle in one property could become a different layout in the next, with extra tiles added if you gain more training space.
That flexibility is one of the biggest advantages of choosing tiles instead of treating the home gym as a permanent renovation.
A Rented Home Doesn't Need a Temporary-Feeling Gym
There is a difference between a removable gym and a makeshift one.
Heavy rubber flooring can create a clearly defined training area while helping protect the property beneath it. Freestanding equipment can still provide a serious strength or conditioning setup.
The important part is designing the room around reversibility from the start.
Avoid permanent fixings.
Use flooring you can lift.
Choose equipment you can dismantle or carry.
Keep the existing surfaces protected.
Then, when your tenancy ends, your home gym does not end with it.
You simply pack it up and build it again at the next address.
Free UK mainland delivery over £300.
Use code SPRUNG30 for 30% off.
Frequently Asked Questions
Can I put gym flooring down in a rented property?
Yes, provided the flooring does not breach your tenancy terms or damage the existing surface. Loose-laid rubber tiles are useful because they can be installed without permanently bonding them to the floor.
Do rubber gym tiles need to be glued down?
Not always. Heavy rubber tiles can be loose-laid on a suitable flat and stable surface. This makes them particularly convenient for rented properties where permanent adhesive would be inappropriate.
What gym flooring is best if I move house regularly?
Modular rubber tiles are useful because they can be lifted individually, transported and laid again in a different configuration. Interlocking tiles with removable connectors are another option.
How many tiles do I need for a 2m × 3m gym?
A 2m × 3m rectangular area covers 6m². If you are using 1m × 1m tiles and the area requires no cuts, six tiles will cover the zone.
Can I build a proper home gym without drilling into the walls?
Yes. A home gym can be built around freestanding equipment such as benches, dumbbells, kettlebells, cardio machines and suitable freestanding racks. Avoid wall-mounted storage and equipment if you need the room to remain completely reversible.