Imagine turning a cold, bare concrete floor into a high‑performance training zone that can handle heavy lifts, HIIT sessions and all the wear you’ll throw at it. With the right steps and preparation, installing rubber gym flooring tiles yourself can deliver a safe, durable surface that looks and functions like a pro job.
In this guide I’ll walk you through exactly how to install gym flooring tiles on concrete, from measuring to finishing touches.
For a quick video guide, watch our tutorial below:
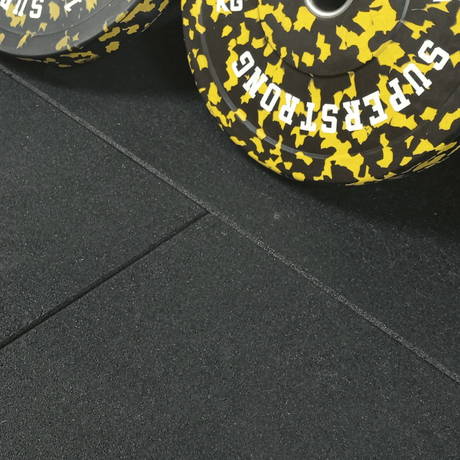
Why Choose Rubber Gym Flooring on Concrete?

Concrete is one of the most stable and reliable sub‑floors you’ll find for a gym space. If you install rubber gym flooring on concrete correctly, you’ll get a surface that resists impact, reduces noise, handles dropped weights and gives your gym space a serious upgrade.
When you install rubber gym flooring on flat concrete you’ll have a long‑lasting and consistent foundation. Some people may wish to install a plywood sub-layer for extra stability if there subfloor is not completely level or it is not in good condition.
Rubber flooring tiles make the process manageable for a DIY install and allow you to cover the area as required, whether you’re building a home gym, garage gym or even a commercial space.
Step‑by‑Step Guide: Installing Rubber Gym Flooring Tiles on Concrete

Here’s how to install gym flooring tiles on concrete, in a straightforward process.
I’ll cover all the key elements: preparation, laying, cutting, adhesive vs loose‑lay options, and finishing touches.
1. Measure and plan your space
Start by measuring the length and width of the room. Use this to determine how many tiles you need (for example if each tile is 1 m × 1 m). In rooms with obstacles or irregular walls mitigate waste by adding approximately 5%‑10% extra material.
Decide on your layout. You might choose to start from a corner or centre; in complex rooms starting in the middle and working outwards often yields a neater result, especially when walls aren’t perfectly straight.
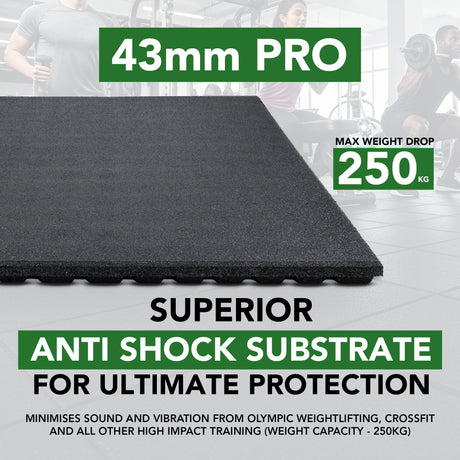
Define the thickness of your rubber gym flooring tiles: heavier use (commercial gym, heavy weights) may demand thicker tiles. Consider this when ordering your materials.
Here is a quick guide on choosing the right thickness for your specific needs:

2. Prepare the concrete sub‑floor
This is a crucial stage. Before you install rubber gym flooring tiles:
- Ensure the concrete is completely clean, dry and free of dust, debris, grease, oil or stains. A poor sub‑floor undermines adhesion and durability.
- Check the surface is level and flat. Minor dips or bumps should be filled or levelled. If you skip this you risk rubber tiles shifting or the floor being uneven.
- Check for moisture. Concrete can hold residual damp or moisture which will interfere if you glue down tiles. Opting for self-draining rubber mats which have water channels built in to the base are advisable for areas prone to high moisture.
- Acclimatise the rubber tiles in the room for 24‑48 hours (depending on manufacturer) so expansion or contraction happens before laying.
3. Choose your installation method: loose‑lay vs adhesive
When installing rubber gym flooring tiles on concrete you’ve got options: loose‑lay (just laying tiles without glue) or gluing them down.
- Loose‑lay: Good for smaller spaces, home gyms, lighter use. If your space is stable and the tiles are weighty enough (ie 15mm or above) the tiles will simply sit in position side by side.
-
Adhesive fixation: For large areas, commercial use, or where you want a permanent, immobile floor, you can glue down the rubber tiles. Some people recommend full adhesion for best results.
In both cases, plan your layout accordingly and follow the tile manufacturer’s guidance. If you expect heavy dropped weights, moving equipment or high traffic, adhesive may be the best choice.
4. Lay the first row and stagger joints
Once your sub‑floor is ready and you’ve chosen glue vs loose‑lay, it’s time to start laying the actual gym flooring tiles:
- Start from a corner or central reference line (depending on your layout plan). Starting in the middle so wall cuts are at the edge can achieve a cleaner look.
- Place the first tile snugly against the wall or long side. Make sure it is aligned square.
- Continue laying the first full row across, ensuring tiles fit tightly together with minimal gaps.
- For the second row and onward, stagger the joints (brick pattern) rather than aligning all seams in a straight grid. This enhances stability and appearance.
- Use a chalk line or straightedge to check your rows remain true and straight across the space.
5. Cutting and trimming around edges
When you reach walls, columns or irregular features, you’ll need to cut rubber tiles to size.
- Mark the cut‐line on the tile with chalk or a pencil.
- Use a sharp utility knife (multiple passes) with a straightedge to make a clean cut. For thicker tiles you may require several passes.
- Trim around skirting boards or wall perimeters so the tile sits flush.
- Retain small off‑cuts if usable for future repair.
- Use final finishing touches to ensure no gaps at edges and minimal visible seams.
6. If gluing: apply adhesive and secure
If you are going with full or partial adhesive, follow these steps:
- Select the correct glue: many recommend a two‑component polyurethane (PU) adhesive for rubber to concrete.
- Apply adhesive only to a manageable area (e.g., a few tiles at a time) so the glue remains workable. For tiles: use a notched trowel to spread adhesive evenly.
- Lower the tile into place instead of sliding it. This avoids shifting glue and ensures full contact.
- After installation, use a heavy roller (eg carpet roller) to compress the tiles, expel air bubbles and ensure full bonding.
- Once complete, avoid traffic/walking on the floor for 24 hours (or as manufacturer dictates) to let adhesive cure fully.
7. Final inspection, finishing touches & cleaning
With tiles laid, you’re almost done. These finishing steps ensure a professional look and long‐lasting durability:
- Walk the entire floor to feel for any loose tiles, gaps, lift‑edges or uneven areas. Ensure all tiles sit flat and flush.
- Especially around the edges and corners, trim if needed so the tile edge meets the wall or skirting without catch.
- Clean the floor surface to remove any chalk lines, debris or adhesive smears. A mild detergent and damp mop is often enough.
- Mark “heavy equipment zones” or consider protective mats under very heavy machines if you anticipate concentrated loads.
- Maintain a regular cleaning schedule: dust and debris can scratch or damage rubber over time and may degrade the surface under high‑traffic gym conditions.
DIY Home Gym: Customer Feedback
"Fantastic product. Very easy to cut with new Stanley blades and went down a dream in our new gym" Craig M
Best practice: how thick should your gym flooring tiles be?

A common question: How thick does my gym flooring need to be? The answer depends on use. For general fitness usage a thickness of around 10‑20 mm may be enough. For heavy weights, Olympic lifting or commercial gym use, 20‑30 mm or more is advisable. 20 mm rubber may not stop damage to concrete under extreme loads, so consider extra thick tiles from 43mm to 63mm for maximum protection.
FAQ
Here are answers to common questions people also search for when installing gym flooring tiles:
Q: Does gym flooring need to be glued down?
A: Not always. If your area is small, the concrete sub‑floor is flat and heavy rubber gym flooring tiles are used, you may get away with a loose‑lay installation. But for large areas, commercial gym flooring use, heavy traffic or equipment that will shift the floor, gluing down (or at least perimeter adhesion) offers a much more stable outcome.
Q: How to stick down gym flooring?
A: Use a high‑quality adhesive suited for rubber on concrete. A two‑component polyurethane glue is often recommended. Apply with a notched trowel as per manufacturer’s instructions, lower tiles carefully into the adhesive (do not slide them), and roll the surface with a heavy roller to achieve full contact.
Q: Do you need to put anything under floor tiles?
A: For concrete sub‑floors, usually you lay tiles directly on the concrete after surface preparation (cleaning, levelling, drying). However, if the concrete is very uneven, cracked or tracks moisture, you may need to level or repair it or use an underlay layer. If you are covering wood, tile, or other sub‐floors you might add a cushion or film layer to prevent staining or movement.
Q: How to lay rubber floor tiles?
A: Start with accurate measurement and planning, prepare the subfloor, start the first tile in a straight line (either a corner or central line), stagger the joints in subsequent rows, cut edge tiles to fit around walls/obstacles, and use adhesive or loose‑lay as appropriate. Use correct tools like utility knife, chalk line and straightedge.
Q: How to cut rubber gym flooring tiles?
A: Measure the area carefully, mark the tile with chalk or pencil, place a straightedge, use a sharp utility knife to make multiple passes if needed (particularly for thicker rubber), then smooth any rough edges if required. Here's a quick video on cutting gym tiles the right way.
Final Thoughts
Installing rubber gym flooring on concrete might seem like a challenge, but done right, it’s a very manageable DIY job. By measuring correctly, preparing the sub‑floor carefully, choosing the right thickness and laying method, and paying close attention during the install, you’ll create a durable, professional‑looking gym floor that stands up to serious use.
Whether you’re creating a home gym or fitting out a commercial space, following these steps will give you confidence and a great final result.
Why not try our Garage Gym Conversion Planner
Let your new gym floor hold up your workouts, so you can focus on what really matters.

![20mm Java Black Rubber Gym Flooring Tiles with Recycled Coffee Grounds [Pre-Order] GYM FLOORING Sprung Gym Flooring](http://www.gym-flooring.com/cdn/shop/files/Title_2.png?v=1773994895&width=460)